How to Kill Every Large Arc in Arc Raiders (Bastion, Bombardier & Leaper Guide)
Large Arc in Arc Raiders are resource-intensive, time-consuming, and potentially run-ending if you don't know what you're doing. The Bastion can shred you with its machine gun while you're poking at its knees. The Bombardier is a slug-fest if you're fighting it wrong. And the Leaper — well, the Leaper has always been its own special kind of frustrating. The good news: all three of these enemies have weaknesses that most players aren't exploiting, and some of the fastest kill methods are also the least obvious.
This guide covers the best current strategies for taking down the Bastion, Bombardier, and Leaper — including the quick-kill methods that don't require a Deadline or Wolfpack.
A Note on Running Without a Deadline or Wolfpack
If you already have a Deadline or Wolfpack in your loadout, large Arc encounters become significantly more manageable — those tools were designed for exactly this purpose. But not every player has them, whether due to blueprint availability, cost, or expedition start. Everything in this guide is built around the assumption that you're working with more commonly available weapons and tools, and it's entirely viable to handle all of these Arc without the premium launchers.
How to Kill the Bastion
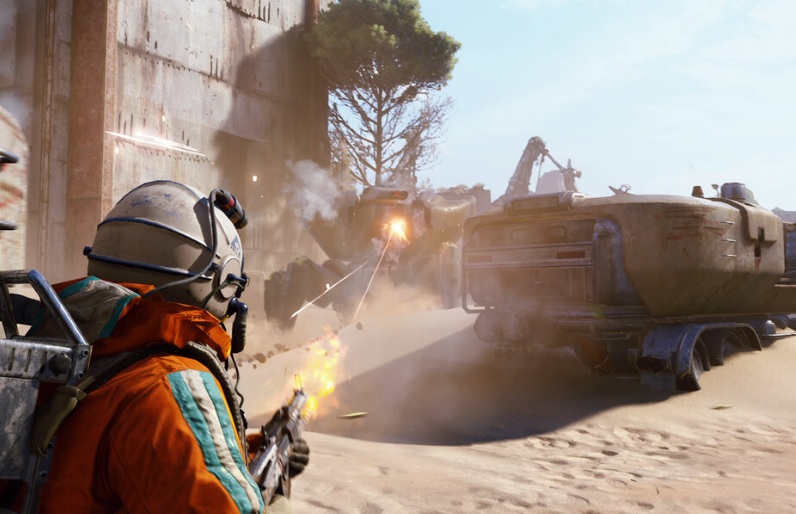 — Fighting Bastion —
The Bastion is one of the most iconic large Arc fights in the game, and most players approach it the same way: shoot the glowing yellow knees, repeat until dead. It works, but it's not the fastest method — and there are actually two alternative strategies that can bring the Bastion down quicker depending on your playstyle and what you're carrying.
Method 1: Break the Canister, Expose the Core (High DPS Required)
Once you've destroyed one of the Bastion's yellow knee joints, reposition to its backside and target the yellow canister located there. If your weapon has a high enough damage per second, you can break the canister — this destabilises the Bastion for an extended period and exposes its inner red core. Shooting that red core is the fastest path to destroying the Bastion outright.
The key requirement here is sustained DPS. This method works with:
- Torrente
- Volcano
- Tempest
- Any weapon with a large magazine and high continuous damage output
It does not work reliably with the Anvil, Renegade, or other lower-capacity weapons that can't sustain the damage needed to crack the canister quickly enough. If your loadout doesn't have a high-DPS primary, use Method 2 instead.
Method 2: Get Elevation and Shoot the Soft Red Armour
This is arguably the most accessible Bastion kill method in the game, and it doesn't require breaking knees, legs, or any specific weapon type. Get to higher ground and focus your fire on the red section on the Bastion's top — the soft armour plating that sits in the middle of the top of the unit.
This area has noticeably weaker armour than the Bastion's outer plating. Shooting it consistently from elevation can destroy the Bastion quickly and efficiently, and it works with a surprisingly wide range of weapons:
- Anvil — Excellent for this method
- Renegade — Works very well
- Stitcher — Even this will get the job done from elevation
- Impact Grenades — Roughly 20 grenades will destroy the Bastion using this method if you're lobbing them accurately at the top
The red soft armour approach is worth learning first because it removes most of the positioning complexity around the knee/leg routine and is significantly faster in the hands of most players.
General Bastion Combat Tips
- Prioritise high ground. Almost every Bastion strategy improves with elevation, both for angle of attack and for cover from the machine gun
- Avoid the front-facing armour. The armoured front sides and the plating directly around its machine gun will absorb a lot of damage — fighting from those angles wastes shots
- Use XP feedback as a damage indicator. If your shots are awarding around 400–600 XP each, you're hitting unarmoured areas. Significantly less than that means you're clipping armour and wasting damage
How to Kill the Bombardier
The Bombardier is a slow, grindy fight when you're doing it wrong, and a reasonably clean kill when you understand its armour layout. The most important thing to know about the Bombardier is this: its armour is the inverse of the Bastion's.
- The Bastion has weak armour in the middle and stronger armour on the outer sections
- The Bombardier has stronger armour in the middle and weaker outer armour that strips off quickly
This means the optimal approach is to break off the outer armour plates first using a weapon with high Arc armour penetration, then dump as much damage as possible into the exposed centre. Once the outer armour is gone, you'll deal significantly more damage per shot to the core.
Dealing with the Spotters
The Bombardier's biggest combat complication isn't the missiles — it's the Spotters it deploys. While Spotters are active, the Bombardier has near-pinpoint accuracy with its missile barrage, making it extremely difficult to safely peek and fire. Bringing Seekers to eliminate the Spotters first is highly recommended. Once the Spotters are down, the Bombardier's missile accuracy drops significantly and the fight becomes much more manageable.
Combat Positioning
Unlike the Bastion, fighting the Bombardier from behind cover isn't ideal — it will almost always land missiles on you regardless of how you peek. The better approaches are:
- Fight in the open at range and actively dodge each missile shot while firing back
- Close the distance aggressively to bait out the short-range explosion shockwaves, which are more predictable and easier to avoid than the missiles
A word of honesty: the Bombardier without a Deadline is a legitimate slog. If you find yourself in a situation where you need to take one down and you don't have a launcher, the Seeker-plus-outer-armour-strip approach is your best option. But if you're farming Bombardiers regularly, getting your hands on a Deadline will save you a significant amount of time and resources.
Bonus Tip: Shoot the Missiles
Bombardier missiles can be shot down mid-air. Landing a shot on an incoming missile causes it to detonate early, saving you from some otherwise unavoidable damage. Worth practising — it's a useful survival skill during longer fights.
How to Kill the Leaper
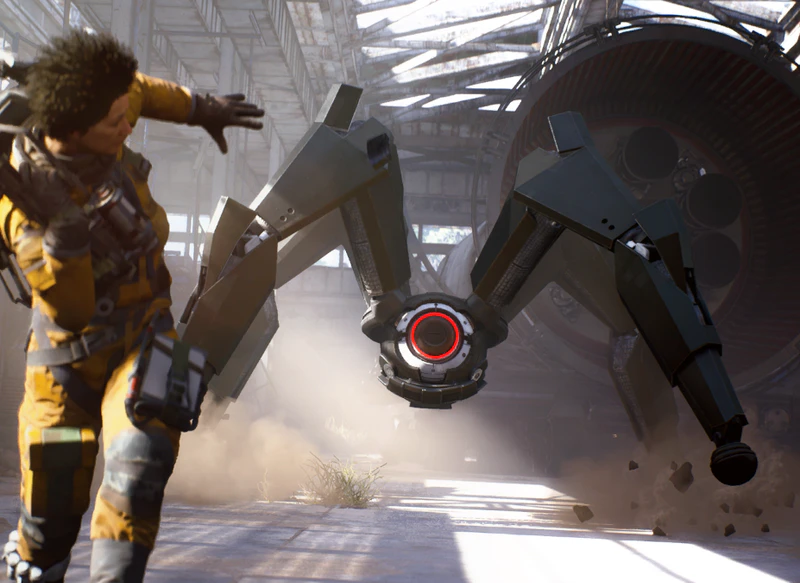 — Fighting Leaper —
There's no elegant trick here, and it's worth being upfront about that. The Leaper used to have specific weak-point strategies that made the fight quicker — Trailblazer rounds, Blaze Nades — but those approaches no longer work effectively against it in the current state of the game.
What you're left with is the honest answer: bring a heavy Arc armour penetration weapon and shoot it in the eye. That's the weak point, that's the strategy, and that's what works. The fight is not particularly interesting tactically, but it's reliable.
Managing the Leaper's Movement
The main difficulty with the Leaper isn't the damage output — it's hitting the eye consistently while the Leaper is constantly repositioning. A few things that help:
- Lure it to a doorway or tight corridor. Confined spaces restrict the Leaper's movement dramatically and give you much cleaner shot opportunities at the eye
- Don't try to fight it in open ground. The Leaper's erratic movement in open space will drag the fight out considerably and burn through more ammo than necessary
The Leaper is one of those Arc where patience and positioning matter more than mechanical execution. If you've got a Hullcracker on you, it can handle the Leaper too — though it's not a great matchup due to the movement making consistent core hits difficult. A heavy ammo weapon with sustained fire remains the cleanest option.
Quick Reference: Large Arc Kill Methods
| Arc Enemy | Fastest Method | Recommended Weapons | Notes |
|---|---|---|---|
| Bastion | Elevation + shoot soft red top armour | Anvil, Renegade, Stitcher | Works with most weapons from high ground |
| Bastion (alt) | Destroy yellow canister, shoot inner core | Torrente, Volcano, Tempest | Requires high sustained DPS |
| Bombardier | Strip outer armour, unload into centre | Heavy Arc armour penetration weapon | Kill Spotters with Seekers first |
| Leaper | Shoot it in the eye | Heavy Arc armour penetration weapon | Lure to doorway to limit movement |
Weapon Recommendations for Large Arc Farming
If you're planning to regularly farm large Arc and you want to build a loadout around it, here's what performs best in each role:
For Bastion farming: Anything with solid Arc armour penetration works with the elevation/red-armour method. The Anvil is a strong default choice. If you want to run the canister-crack method, pair it with a high-DPS weapon like the Volcano or Torrente.
For Bombardier farming: You genuinely want a Deadline or Hullcracker if you're doing this regularly. Without a launcher, bring a heavy Arc armour penetration weapon for outer armour stripping and Seekers for Spotter control. Expect the fights to take longer.
For Leaper farming: Heavy ammo weapon, full stop. Don't overthink it. Environmental positioning to limit its movement is the only real skill expression available in this fight currently.
Final Thoughts
The Bastion and Bombardier both reward players who understand their armour layouts — shooting the wrong area wastes shots and extends fights unnecessarily. Once you know where the weak points are and which weapons exploit them best, both enemies go from being resource-draining slogs to reasonably clean kills. The Leaper is what it is: a heavy ammo dump that you can at least make more efficient by controlling the environment.
Master the Bastion elevation method first. It's the most versatile, works with the widest range of weapons, and will serve you well in the majority of large Arc encounters you'll run into on any given expedition.
For flying Arc including the Firefly, Hornet, Wasp, Comet, and Rocketeer, check out our companion guide: How to Kill Every Flying Arc in Arc Raiders.