How to Kill Every Flying Arc in Arc Raiders (Firefly, Hornet, Wasp, Comet & Rocketeer)
Flying Arc in Arc Raiders are some of the most irritating enemies in the game. The Firefly swoops around with its armoured thrusters, the Comet rolls straight at your face, and the Rocketeer rains missiles from altitude while most players waste half their ammo trying to figure out where to even aim. The game has evolved, weapons have been nerfed and rebalanced, and the old go-to methods don't always hold up. This guide breaks down the fastest, most efficient ways to take down every flying Arc enemy — including the exact angles, weapons, and tools that make each fight significantly easier.
Why Weapon Choice Matters More Than You Think
Before jumping into specific Arc types, there's an important mechanic that most players overlook: bullet projectile size.
Light, medium, and heavy weapons don't just determine Arc armour penetration — they also fire projectiles of different physical sizes. This might sound minor, but it has a real impact on fights against Arc with small, precise weak points.
Here's how it breaks down in practice: a Kettle fires a small, narrow projectile. A Renegade fires a medium-sized one. An Anvil fires a noticeably large one. When you're trying to hit a tiny exposed core — like on the Comet — there is a meaningful difference in whether your shot clips the surrounding outer armour or lands cleanly on the target. A larger bullet has more surface area that can accidentally contact the wrong hitbox, wasting damage on armoured plating instead of the soft interior.
This is why a fast-firing weapon like a Kettle or Renegade will often outperform the Anvil on specific Arc, even though the Anvil has higher raw damage. Hitting the right spot consistently beats hitting harder but inaccurately. Keep this in mind as we go through each enemy.
How to Kill the Firefly
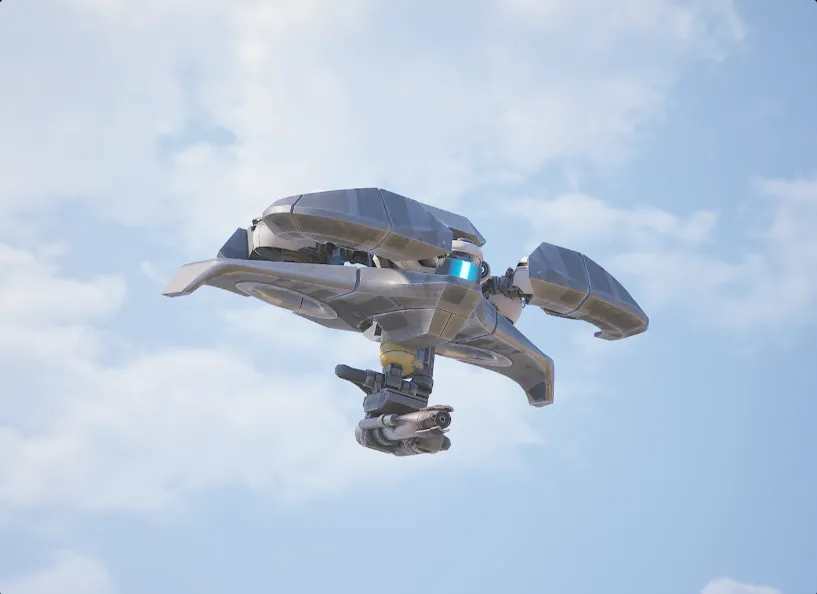 — Firefly —
The Firefly is probably the most complained-about Arc in the game, and for good reason. It's fast, it's tanky when you're fighting it the wrong way, and its armour layout punishes players who don't know where to aim.
The Weak Points
The Firefly has two primary weak points: its thrusters and a yellow canister. Shooting the canister enough times will cause it to explode, dealing fire damage to the Firefly and killing it quickly. However, doing this at close range means you're also catching the fire damage yourself, which makes it a messy and risky approach unless you have significant range on the shot.
The Standard Method: Break Armour, Then Shoot Thrusters
The most common approach is to first destroy the armour plating protecting the thrusters, then hit the now-exposed thruster directly. With a weapon that has at least moderate Arc armour penetration, this is not particularly difficult. Using an Anvil, this takes four shots total:
- First shot breaks the armour
- Second shot destroys the thruster
- Repeat for the second thruster
The Firefly crashes to the ground. Clean and reliable.
The Faster Method: Use Vertical Angles to Skip the Armour
Here's where you can cut that down to just two shots. The Firefly's armour is designed to block thruster shots when you're shooting from the same horizontal level as the Arc. The armour sits in a position that deflects bullets coming straight at it from the side. But if you're above or below the Firefly, that armour no longer protects the thrusters — you get a direct angle straight to them.
- If you're above the Firefly: shoot the back thrusters directly, one shot each
- If you're below the Firefly: you can angle into either the back or front thrusters
Two shots, two thrusters, Firefly down — no armour stripping required. Getting used to crouching, finding elevated positions, or simply waiting for the Firefly to adjust its flight path to give you the right angle makes this the most efficient method available.
How to Kill the Hornet
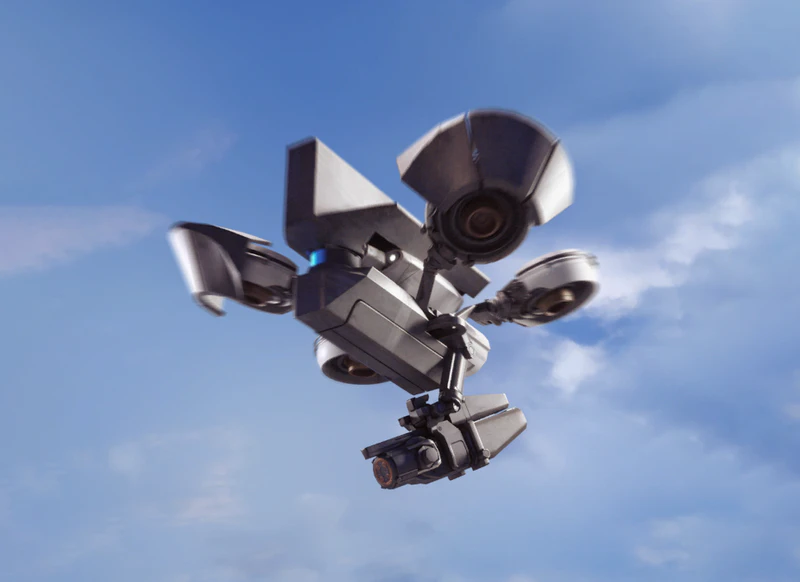 — Hornet —
The same vertical angle technique that works on the Firefly applies directly to the Hornet. Crouching as the Hornet flies toward you, or waiting for it to tilt upward during its attack animation, opens up a clear shot to its thrusters without touching the armour. Two shots to take it down — same principle, same execution. Once you've practised the angle approach on Fireflies, Hornets become dramatically less threatening.
How to Kill the Wasp
The Wasp is slightly different. Under normal circumstances, it takes around three Anvil shots to destroy. However, there are two ways to speed this up:
- Hit the critical point on its back: Two Anvil shots instead of three
- Force it against a wall: If the Wasp is close to a wall, one Anvil shot is enough
Positioning and environmental awareness matter here. If there's a wall nearby, don't engage the Wasp in open space — manoeuvre it toward cover and finish it in one hit.
How to Kill the Comet
The Comet's weak point is well known: once you shoot it and it enters aggro mode, it opens up and exposes an inner core sphere. Hitting that inner sphere does maximum damage and is the fastest way to destroy it. The challenge is that the Comet rolls directly at you while you're trying to hit a small target — and the outer armour ring sticks out slightly beyond the inner core, meaning any shot that clips the edge of the yellow outer armour deals reduced damage.
This is where bullet projectile size becomes critical. The larger the projectile, the higher the risk of accidentally hitting the surrounding outer armour instead of the inner core. With an Anvil, even a well-aimed shot has a meaningful chance of clipping the outer ring. With a Kettle, the small projectile can thread that gap cleanly. With a Renegade, it's somewhere in between.
Recommended weapons for the Comet:
- Kettle — Most forgiving due to small projectile size; easiest to land clean core hits
- Renegade — Best overall choice if your aim is solid; fast fire rate + decent accuracy on the core
- Anvil — Works if you're an extremely precise shot, but the large bullet size will cost you on any misplaced shots
A fast fire rate also compensates for the difficulty of tracking the rolling Comet, which is another reason the Renegade and Kettle outperform slow, high-damage weapons in this particular matchup.
How to Kill the Rocketeer
The Rocketeer is one of the most awkward fights in Arc Raiders if you don't know the trick — and one of the most satisfying once you do.
The best tool for the Rocketeer is the Hornet Driver. A well-placed Hornet Driver will disable the Rocketeer's thrusters, sending it crashing to the ground where it will either be destroyed on impact or left with very little health. The problem is that most players throw it incorrectly and end up disabling the gun instead of the thrusters — which stops the Rocketeer from shooting temporarily but doesn't bring it down.
How to Use the Hornet Driver Correctly on the Rocketeer
Step one: Get within 30 metres of the Rocketeer. The Hornet Driver won't function effectively beyond this range. You can ping the Rocketeer to get a live distance readout.
Step two: Understand how the Hornet Driver works. It has an activation radius — when anything enters that radius while the driver is in the air, it triggers and electrocutes whatever is closest to it at that moment.
- Throwing it directly at the Rocketeer causes it to hit the gun first, disabling the weapon instead of the thrusters
- Throwing it to the side might clip one thruster but won't reliably take the Rocketeer down
Step three: Throw the Hornet Driver up into the air above the Rocketeer. The goal is for it to descend from above, so that when it enters activation range, the first thing it contacts is multiple thrusters simultaneously rather than the gun or a single side thruster. Disabling multiple thrusters at once is what brings the Rocketeer down.
The throw arc takes a little practice but becomes second nature quickly. Once you've nailed the overhead lob, the Rocketeer stops being the nightmare it used to be.
Quick Reference: Flying Arc Kill Methods
| Arc Enemy | Fastest Method | Recommended Weapon | Shots Required |
|---|---|---|---|
| Firefly | Vertical angle to thrusters (above/below) | Anvil | 2 |
| Firefly | Break armour, then thruster | Anvil | 4 |
| Hornet | Crouch/angle to thrusters | Anvil | 2 |
| Wasp | Hit critical point on back | Anvil | 2 |
| Wasp | Force against a wall | Anvil | 1 |
| Comet | Hit inner core sphere | Renegade / Kettle | Variable |
| Rocketeer | Hornet Driver overhead lob to thrusters | Hornet Driver | 1 (driver) |
Final Thoughts
The biggest takeaway from flying Arc combat in Arc Raiders is that angle and positioning matter more than raw damage. The Firefly and Hornet go from multi-shot fights to two-shot kills the moment you adjust your vertical position. The Comet becomes manageable the moment you switch away from the Anvil. And the Rocketeer goes from a frustrating endurance fight to a near-instant takedown the moment you learn the Hornet Driver overhead throw.
Practise the vertical angle technique on Fireflies first — once that's in your muscle memory, everything else falls into place naturally.
For large ground Arc including the Bastion, Bombardier, and Leaper, check out our companion guide: How to Kill Every Large Arc in Arc Raiders.