
Arc Raiders Close Scrutiny Loot Guide: Assessor Matrix, Vaporizer Regulator & All New Items
The Close Scrutiny event doesn't just bring a brutal new challenge — it introduces three new blueprints, two brand new crafting materials critical to the current project, and a spread of high-value Arc components worth farming even if you never pull a legendary drop. This guide covers every piece of loot tied to the event: what drops, where it comes from, what it's worth, and how it feeds into the new project progression.
The Two New Crafting Materials You Need to Know About
Before getting into blueprints, it's worth covering the two new materials introduced alongside Close Scrutiny, because these are going to matter a lot for project progression and are worth picking up every single run regardless of what else you find.
Assessor Matrix
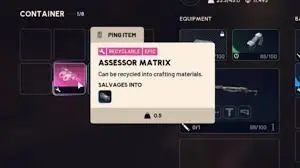 — Assessor Matrix —
The Assessor Matrix is the primary drop from the Arc Assessor compartments themselves. You will almost certainly be picking these up every time you successfully breach and loot an Assessor, even on runs where no blueprint drops.
Value: 5,000 credits each if sold back at Spiranza
More importantly, Assessor Matrices are a required crafting material for the current project — specifically the High Gain Antenna:
- Phase 2: Requires 6 Assessor Matrices
- Phase 3: Requires 18 Assessor Matrices
That's a significant grind. If you're working toward completing the High Gain Antenna project and pushing into the later phases, farming Close Scrutiny Assessors is your primary source for this material. Every run where you successfully loot even one compartment is a run that moves your project progress forward, even if no blueprints show up.
Vaporizer Regulator
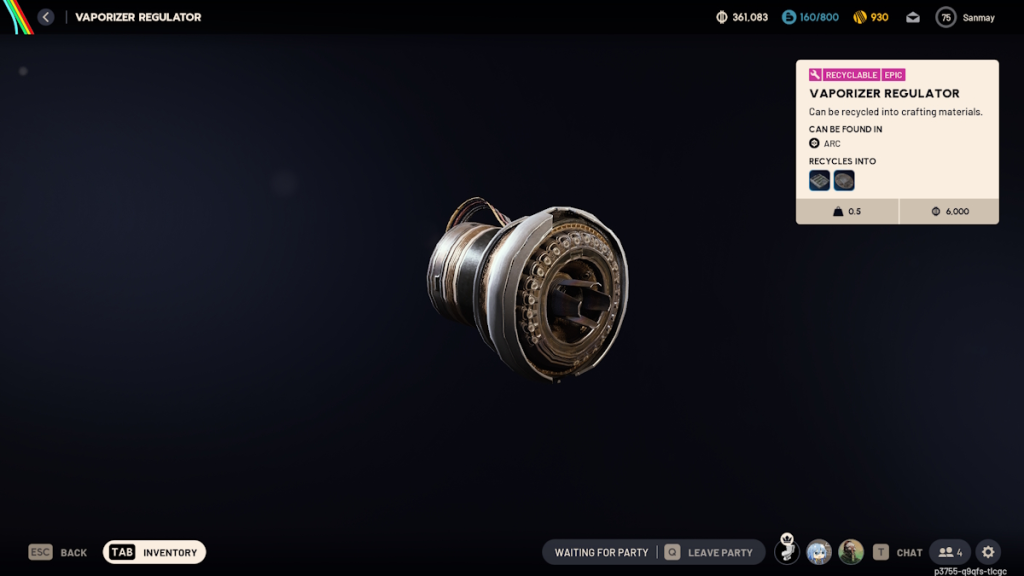 — Vaporizer Regulator —
The Vaporizer Regulator drops from killing Vaporizers — the new aerial Arc unit introduced in this event. These are also tied to project progression:
- Phase 2: Requires 4 Vaporizer Regulators
- Phase 3: Requires 15 Vaporizer Regulators
Phase 3's requirement of 15 is a serious ask, particularly given how dangerous and resource-intensive Vaporizer kills are. If you're actively fighting Vaporizers during your Assessor runs rather than avoiding them entirely, banking the Regulators for project use is far more valuable than selling them.
General Arc Loot from This Event
Beyond the two dedicated materials above, the Close Scrutiny event drops a solid range of general Arc components that are either sellable for good value or usable in crafting. Confirmed drops from Assessor runs include:
- Arc Performance Steel
- Advanced Arc Power Cells
- Arc Flex Rubber
- Standard Arc components in varying quantities
All of these feed into the broader new project introduced with Flashpoint, so even runs where the RNG doesn't favour you with a blueprint or rare material are still productive from a crafting standpoint.
Combat Supply Caches: Don't Overlook These
One of the underreported features of Close Scrutiny is the Combat Supply Caches that appear marked on the map during the event. These are distinct from the Arc Assessors and represent entirely separate loot opportunities that many players run straight past.
Combat Supply Caches contain:
- Ammo Crates
- Medicine Bags
- Grenade Tubes
- Weapon Cases
The Weapon Cases in particular can contain high-value drops — blueprint finds, including rare weapon blueprints, have been confirmed from these caches. If you arrive at an Assessor and the Arc presence is too intense to breach safely, swinging past the Combat Supply Cache markers on your map is a worthwhile detour. They're often ignored by players laser-focused on the Assessors, meaning you may find them completely untouched.
New Blueprints from the Close Scrutiny Event
Three new blueprints were introduced alongside the Close Scrutiny event and Flashpoint update. Here's where each one comes from and what it does.
Dolabra — Legendary Energy Shotgun Blueprint
Source: Arc Assessors (Close Scrutiny event) Rarity: Extremely rare Type: Legendary Energy Shotgun
The Dolabra is the headline blueprint of this update and the most coveted drop in the Close Scrutiny event. It's a Legendary Energy Shotgun described as being built to punch through armour plating at close range — which given the current meta of energy weapons and shield-heavy PvP builds, is a very strong proposition on paper.
Be realistic about the drop rate going in: players have reported looting dozens of Assessors without seeing a single Dolabra blueprint. It is genuinely rare, not just uncommon. The Arc Assessors during Close Scrutiny are currently the primary and only confirmed source for this blueprint. If better sources are discovered, the community will likely surface them quickly, but for now, Assessor farming is your only avenue.
Given the difficulty of the event and the low drop rate, every run that gets you Assessor Matrices for project progression is still a productive run even if the Dolabra doesn't show. Treat it as a bonus when it appears rather than the sole metric for a successful run.
Canto — Medium Ammo SMG Blueprint
Source: Hurricane Caches (Hurricane event) — NOT the Close Scrutiny event Type: Medium Ammo SMG
The Canto is worth mentioning here because it was introduced at the same time as Close Scrutiny and players naturally assume both new weapon blueprints come from the same event. They don't.
The Canto SMG blueprint drops exclusively from Hurricane Caches during the Hurricane event, not from Arc Assessors. If you're hunting the Canto, you need to load into Hurricane Raid maps and loot the Hurricane-specific cache locations there. There is no confirmed Canto drop from the Close Scrutiny event.
Surge Coil — Deployable Electrification Device Blueprint
Source: Breachable containers, lockers, and standard containers — multiple maps and events Best Maps: Damn Battlegrounds (46% of community finds reported here) Best Event: Electromagnetic Storm (primary), though Close Scrutiny can also yield it Type: Equipment — Deployable device that periodically electrifies its surroundings
The Surge Coil is a deployable piece of equipment that emits periodic electric pulses around its placement point. Unlike the Dolabra and Canto, the Surge Coil is not locked to a single event or source — it can drop from breachable containers, lockers, and standard containers across multiple maps.
Community data via Metaforge currently shows:
- 46% of Surge Coil finds are reported on Damn Battlegrounds
- The Electromagnetic Storm event is the most commonly associated event for drops
- Close Scrutiny also has a chance to yield the Surge Coil from Assessor loot
If you're specifically farming for the Surge Coil blueprint, running the Research and Administration Building on Damn Battlegrounds during the Electromagnetic Storm is your highest-probability play based on current community data. That said, it can turn up in Close Scrutiny runs as well, so it's worth keeping an eye out during every Assessor loot.
Loot Priority: What to Focus On Per Run
Given everything available in this event, here's how to think about loot priority depending on where you are in your progression:
If you're pushing project completion (High Gain Antenna): Assessor Matrices are your primary objective. Dolabra is a bonus. Fight or avoid Vaporizers based on how many Regulators you still need for Phase 2 and 3. Don't skip Combat Supply Caches — Weapon Cases there can contain materials you need.
If you're hunting the Dolabra blueprint: Run every Close Scrutiny Assessor you can reach. Use the cloak-and-smoke strategy to maximise the number of compartments you successfully breach per run. Bank your Assessor Matrices as a consolation on dry runs — they'll be useful for the project and sell for decent value if you're capped.
If you're hunting the Surge Coil: Close Scrutiny gives you a chance at it, but Damn Battlegrounds during Electromagnetic Storm is a more reliable farm. Running Close Scrutiny for Surge Coil specifically isn't the optimal play compared to dedicated Damn Battlegrounds runs.
If you're a newer player building up resources: The general Arc components and Combat Supply Cache drops from this event are genuinely strong. Advanced Arc Power Cells, Arc Performance Steel, and Arc Flex Rubber all feed into meaningful crafting, and the 5,000-credit Assessor Matrices are solid sell value for building up funds.
Assessor Breaching Strategy: Maximise Compartments Per Run
The single biggest mistake players make during Close Scrutiny is trying to clear every Arc before breaching an Assessor. This costs you time, resources, and — most importantly — the opportunity to hit multiple compartments before the event phase shifts.
The Cloak-and-Smoke Method
The most efficient breaching strategy relies on two tools you already have access to:
- Engage your cloak before entering the Assessor's vision cone. The cloak breaks the Assessor's initial detection, giving you roughly 5-7 seconds of safe movement toward the compartment.
- Deploy smoke the moment you reach the interaction point. The smoke blocks the Assessor's line of sight during the breach animation, which is when most players take damage. Without smoke, you're eating beam damage for the full 3-4 second breach window.
- Do not fight the Assessor. Your goal is the loot, not the kill. Unless you need Vaporizer Regulators and see a Vaporizer nearby, there is zero reason to engage the Assessor directly. Every second spent fighting is a second another compartment is being looted by a different squad.
Compartment Routing
Arc Assessors have multiple compartments, and each one can be breached independently. On a well-executed run with the right tools, you can breach 3-4 compartments from a single Assessor before the event phase ends. The key is to loop around the Assessor's patrol pattern rather than breaching from the same approach twice — the Assessor adapts its gaze toward recently triggered compartments.
A good benchmark: if you're extracting with fewer than 3 Assessor Matrices from a Close Scrutiny run, review your approach route. With the cloak-and-smoke method, three breaching compartments per run is the floor, not the ceiling.
Vaporizer Combat: When to Fight, When to Flee
The Vaporizer is the new aerial Arc unit introduced in Close Scrutiny, and it fills a specific ecological niche that makes it more dangerous than it first appears.
The Vaporizer Threat Profile
- Movement: Erratic aerial pathing that makes headshots difficult with single-shot weapons
- Attack: A sustained beam attack that tracks if you move predictably
- Health: Medium — roughly equivalent to a standard ARC trooper, but harder to hit
- Drop: Vaporizer Regulator (project material) plus standard Arc components
Ideal Engagement Windows
Fight a Vaporizer when:
- You have a fast-firing weapon (SMG or AR with 600+ RPM). The Vaporizer's erratic movement is much harder to track with a bolt-action or semi-auto weapon.
- The area is already clear of other threats. The Vaporizer beam draws attention, and fighting it in a crowded area invites third parties.
- You need Vaporizer Regulators for Phase 2 or Phase 3 of the High Gain Antenna project. The Phase 3 requirement of 15 Regulators is steep enough that you cannot afford to skip Vaporizer kills entirely if you want to complete the project.
Avoid a Vaporizer when:
- You're carrying high-value loot that makes death unacceptable
- You have a slow-firing or inaccurate weapon
- You hear gunfire nearby — assume a third party is about to arrive
- You already have enough Regulators for your current project phase
Positioning During the Fight
The Vaporizer's beam tracks predictable movement. If you strafe in one direction, the beam follows. The counter is to change direction mid-strafe — the beam has a small reaction delay, and a well-timed direction change causes it to overshoot. This window is your opportunity to land shots. With practice, you can chain these direction changes to keep the Vaporizer's beam missing while you tear through its health bar.
Route Optimization: Farming Efficiency Per Map
Not all maps are created equal for Close Scrutiny farming. Here's how they rank:
Dam Battlegrounds — Best Overall
The map has the highest concentration of Assessor compartments and multiple Combat Supply Caches. The layout also offers good cover between compartments, making the cloak-and-smoke method easier to execute. If you can only run one map for Close Scrutiny, this is the one.
Spaceport — Good Alternate
Fewer compartments but better sight lines for spotting approaching third parties. The open areas make Vaporizer fights easier since you have room to manoeuvre. The trade-off is less cover between compartments, meaning your cloak timing needs to be tighter.
Bluegate — High Risk, High Reward
The tight quarters around compartments make breaching harder and third parties more likely. However, the density of ARC spawns means more Vaporizer Regulator opportunities. Run Bluegate if you need Regulators more than Matrices.
Buried City and Stella Montis — Situational
These maps have the fewest Assessor compartments and the longest routes between them. Only run these if you're already on them for other objectives (boss farming, specific blueprints). They are not efficient for dedicated Close Scrutiny farming.
Blueprint Market Analysis: What to Craft and What to Sell
Once you start pulling blueprints from Close Scrutiny, the question becomes whether to craft the item or sell the blueprint.
Dolabra Blueprint
Verdict: Craft immediately. The Dolabra is a Legendary Energy Shotgun, and Legendary-tier weapons in the current meta are best-in-slot for their role. The crafted weapon is worth significantly more than the raw blueprint, and owning one gives you a meaningful PvP advantage in close-quarters engagements. If you somehow pull two, craft one and sell the second blueprint on the player market.
Surge Coil Blueprint
Verdict: Craft immediately. The Surge Coil is utility equipment, not a weapon, which means it doesn't compete with your primary loadout slot. A deployable electrification device has applications in both PvE (crowd control against ARC patrols) and PvP (area denial during third-party defence). It's one of the few pieces of equipment that pays for itself in utility within a few runs.
Canto Blueprint
Verdict: Situational. The Medium Ammo SMG is a good weapon in the right build, but it requires specific augment and shield support to shine. If you run a light or medium loadout and prefer close-range engagements, craft it. If you're a heavy shield / long-range player, sell the blueprint — it won't outperform your current options.
Summary: Close Scrutiny Loot at a Glance
| Item | Source | Primary Use |
|---|---|---|
| Assessor Matrix | Arc Assessor compartments | High Gain Antenna project (6 for Phase 2, 18 for Phase 3) — or 5,000cr sell value |
| Vaporizer Regulator | Killing Vaporizers | High Gain Antenna project (4 for Phase 2, 15 for Phase 3) |
| Dolabra Blueprint | Arc Assessors | Legendary Energy Shotgun — craft and use |
| Canto Blueprint | Hurricane Caches (Hurricane event only) | Medium Ammo SMG — craft and use |
| Surge Coil Blueprint | Any breachable containers (best on Damn BG / Electromagnetic Storm) | Deployable electric area device |
| Arc Components (various) | Arc kills and Assessor loot | Crafting / sell |
| Combat Supply Cache items | Map-marked supply caches | Ammo, heals, grenades, weapon drops |
Final Thoughts
The Close Scrutiny event is dense with loot opportunity — but it rewards players who understand the full picture rather than just chasing the headline Dolabra drop. The Assessor Matrix grind for the High Gain Antenna project is real and ongoing, the Vaporizer Regulators add up faster than you'd expect once you start actively hunting Vaporizers, and the Combat Supply Caches are a genuinely underused source of free high-value gear.
Go in with the cloak, smoke your way through, grab what you can from each compartment, and treat every matrix you pull as progress even when the legendary doesn't drop. The Dolabra will come eventually — and when it does, you'll already be ahead on project materials.
For the full breakdown of how Close Scrutiny works, the new Vaporizer Arc, and the best survival strategy, check out our companion guide: Arc Raiders Close Scrutiny Event Guide — How It Works, Best Strategy & Survival Tips.